
Build the installation
Choose a push button and a switch actuator in vKNX. Import their product files into ETS and add both devices to your project.
Program push buttons, lighting actuators and sensors directly in ETS. Operate your installation and trace its bus telegrams without physical KNX hardware.
1.1.1 → 0/0/1 · Write · 1The illustration above is a mock-up. These are pictures of the program itself, with devices that have been addressed and downloaded like real ones.
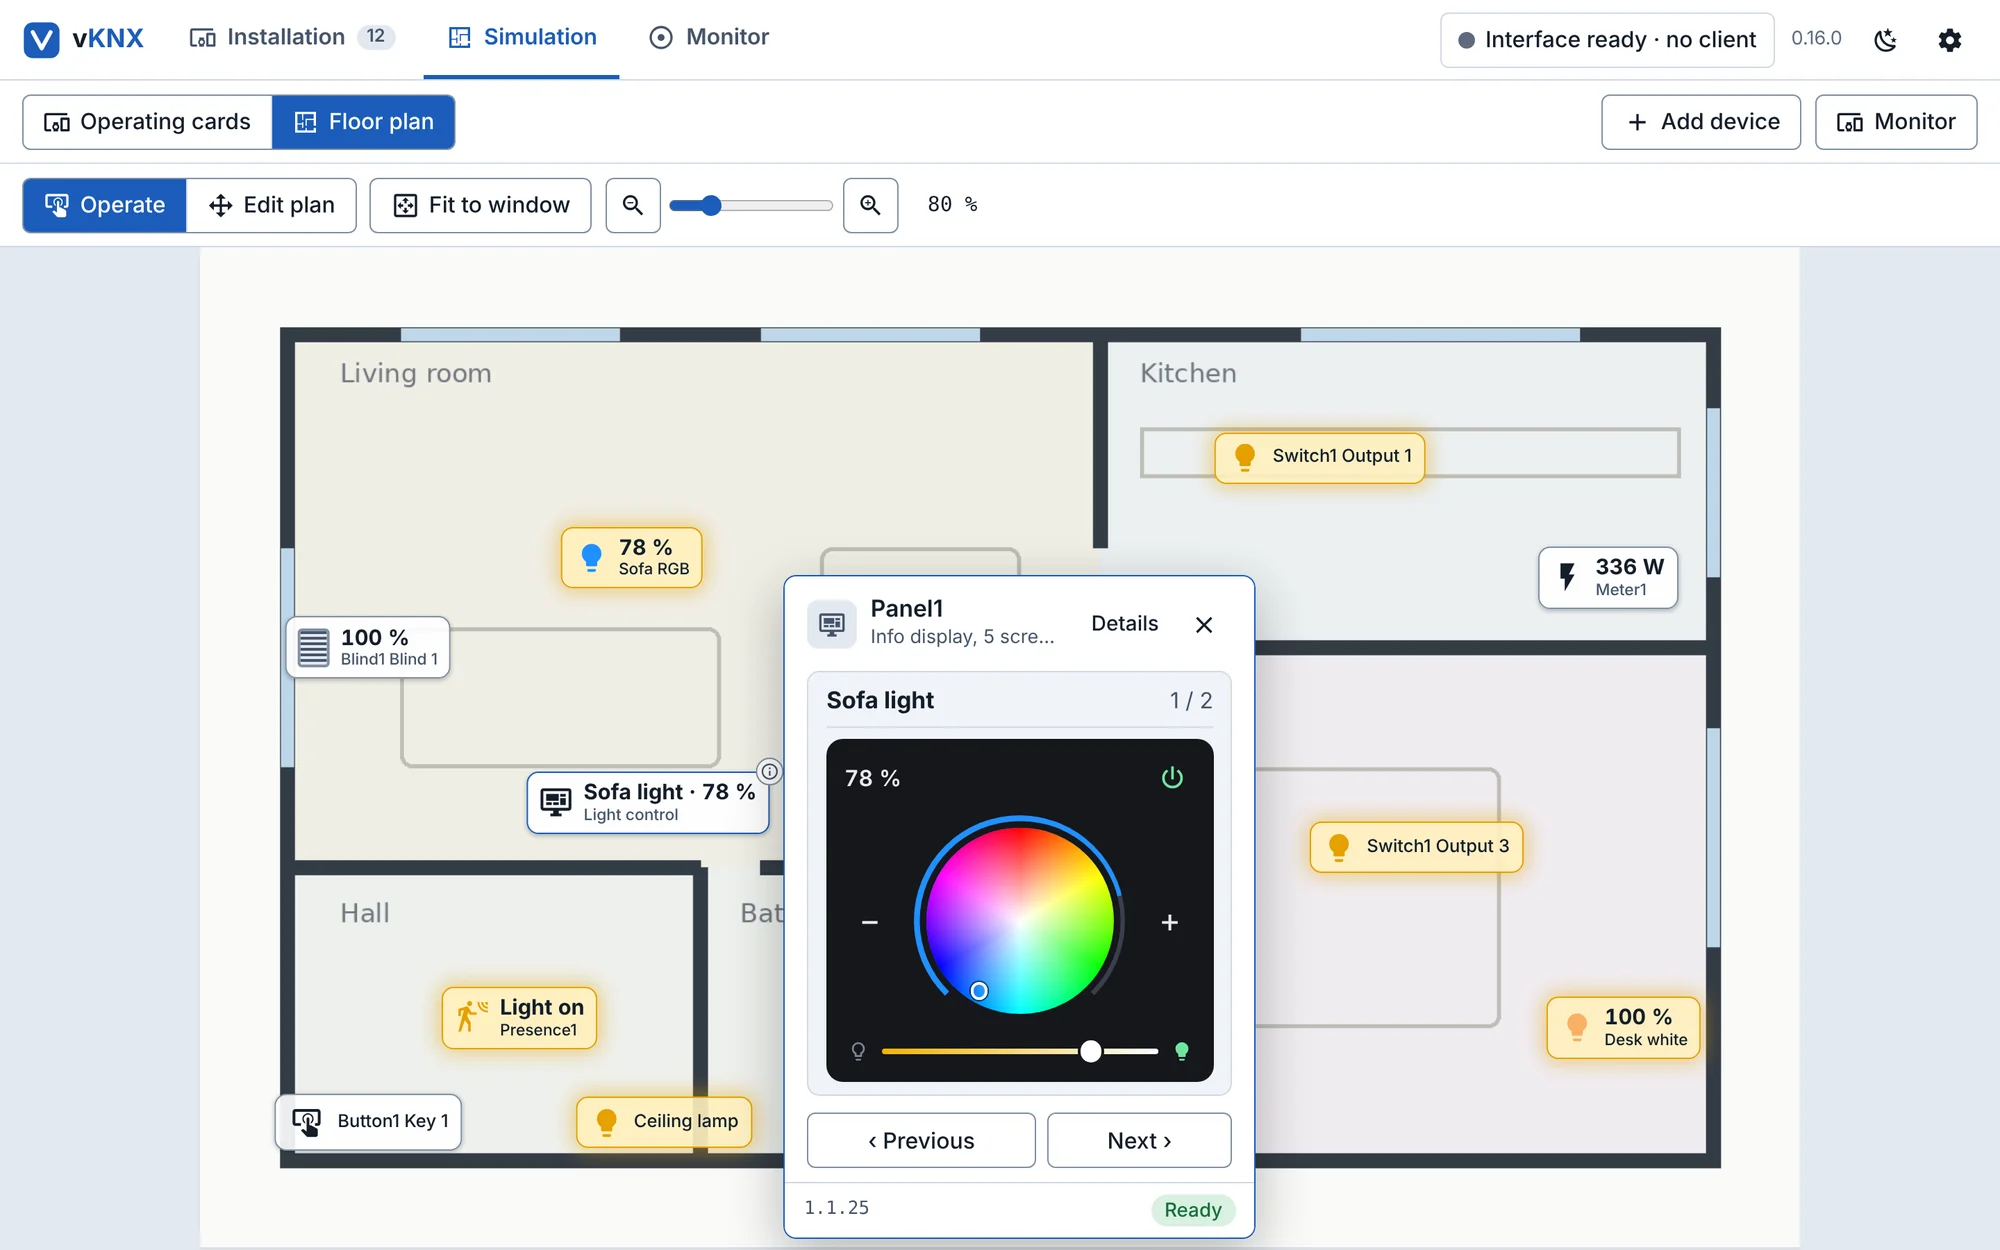
Your own floor plan with live symbols. Click a symbol to operate the device, here a light control screen with a colour wheel.
See all screenshots →Choose a push button and a switch actuator in vKNX. Import their product files into ETS and add both devices to your project.
Link the push button and the actuator output with a group address. Press the programming button in vKNX, then download the individual address and application from ETS.
Press the button on the floor plan. Watch the output change, then find the sender, group address and value in the telegram monitor.
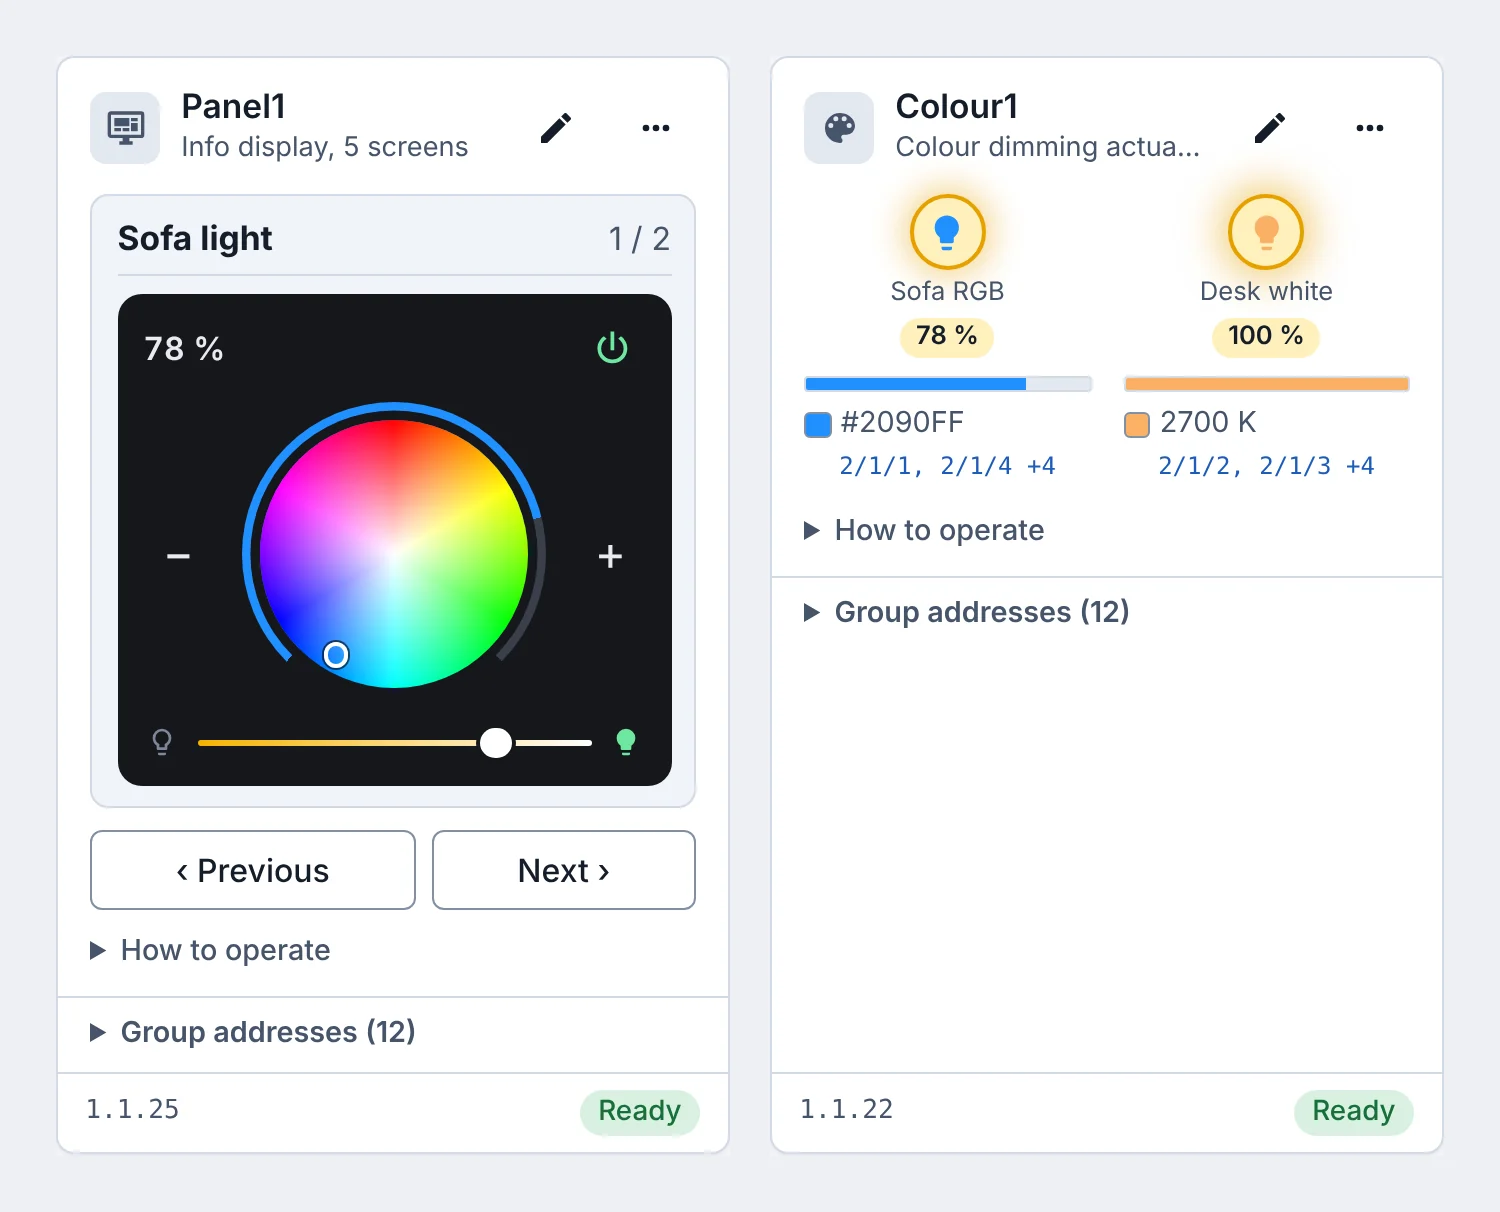
The info display can now be a light control screen: on and off, brightness, and a colour wheel or a colour temperature. Together with the new colour dimming actuator it gives students RGB (DPT 232.600) and tunable white to work with in ETS.
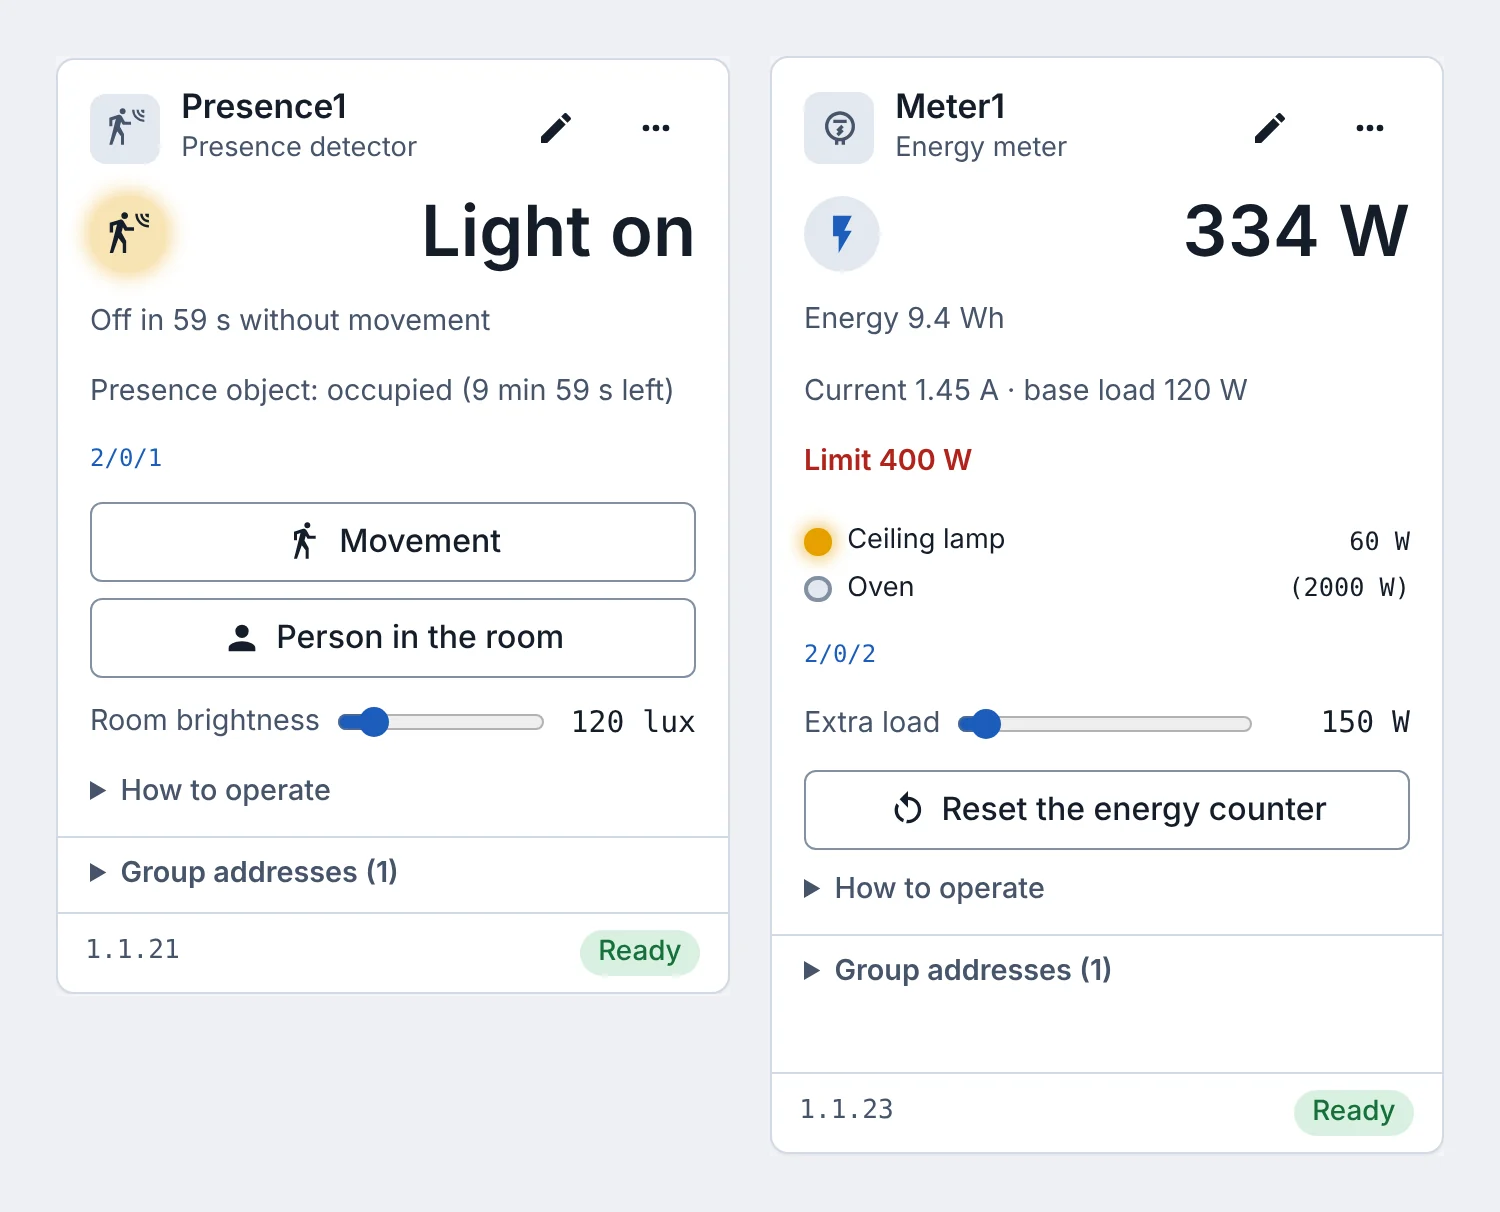
The presence detector switches the light on movement, with a follow-up time and a brightness threshold you can try from its card. The energy meter adds up the loads you give it and reports power, energy and current, with a limit that can raise an alarm.
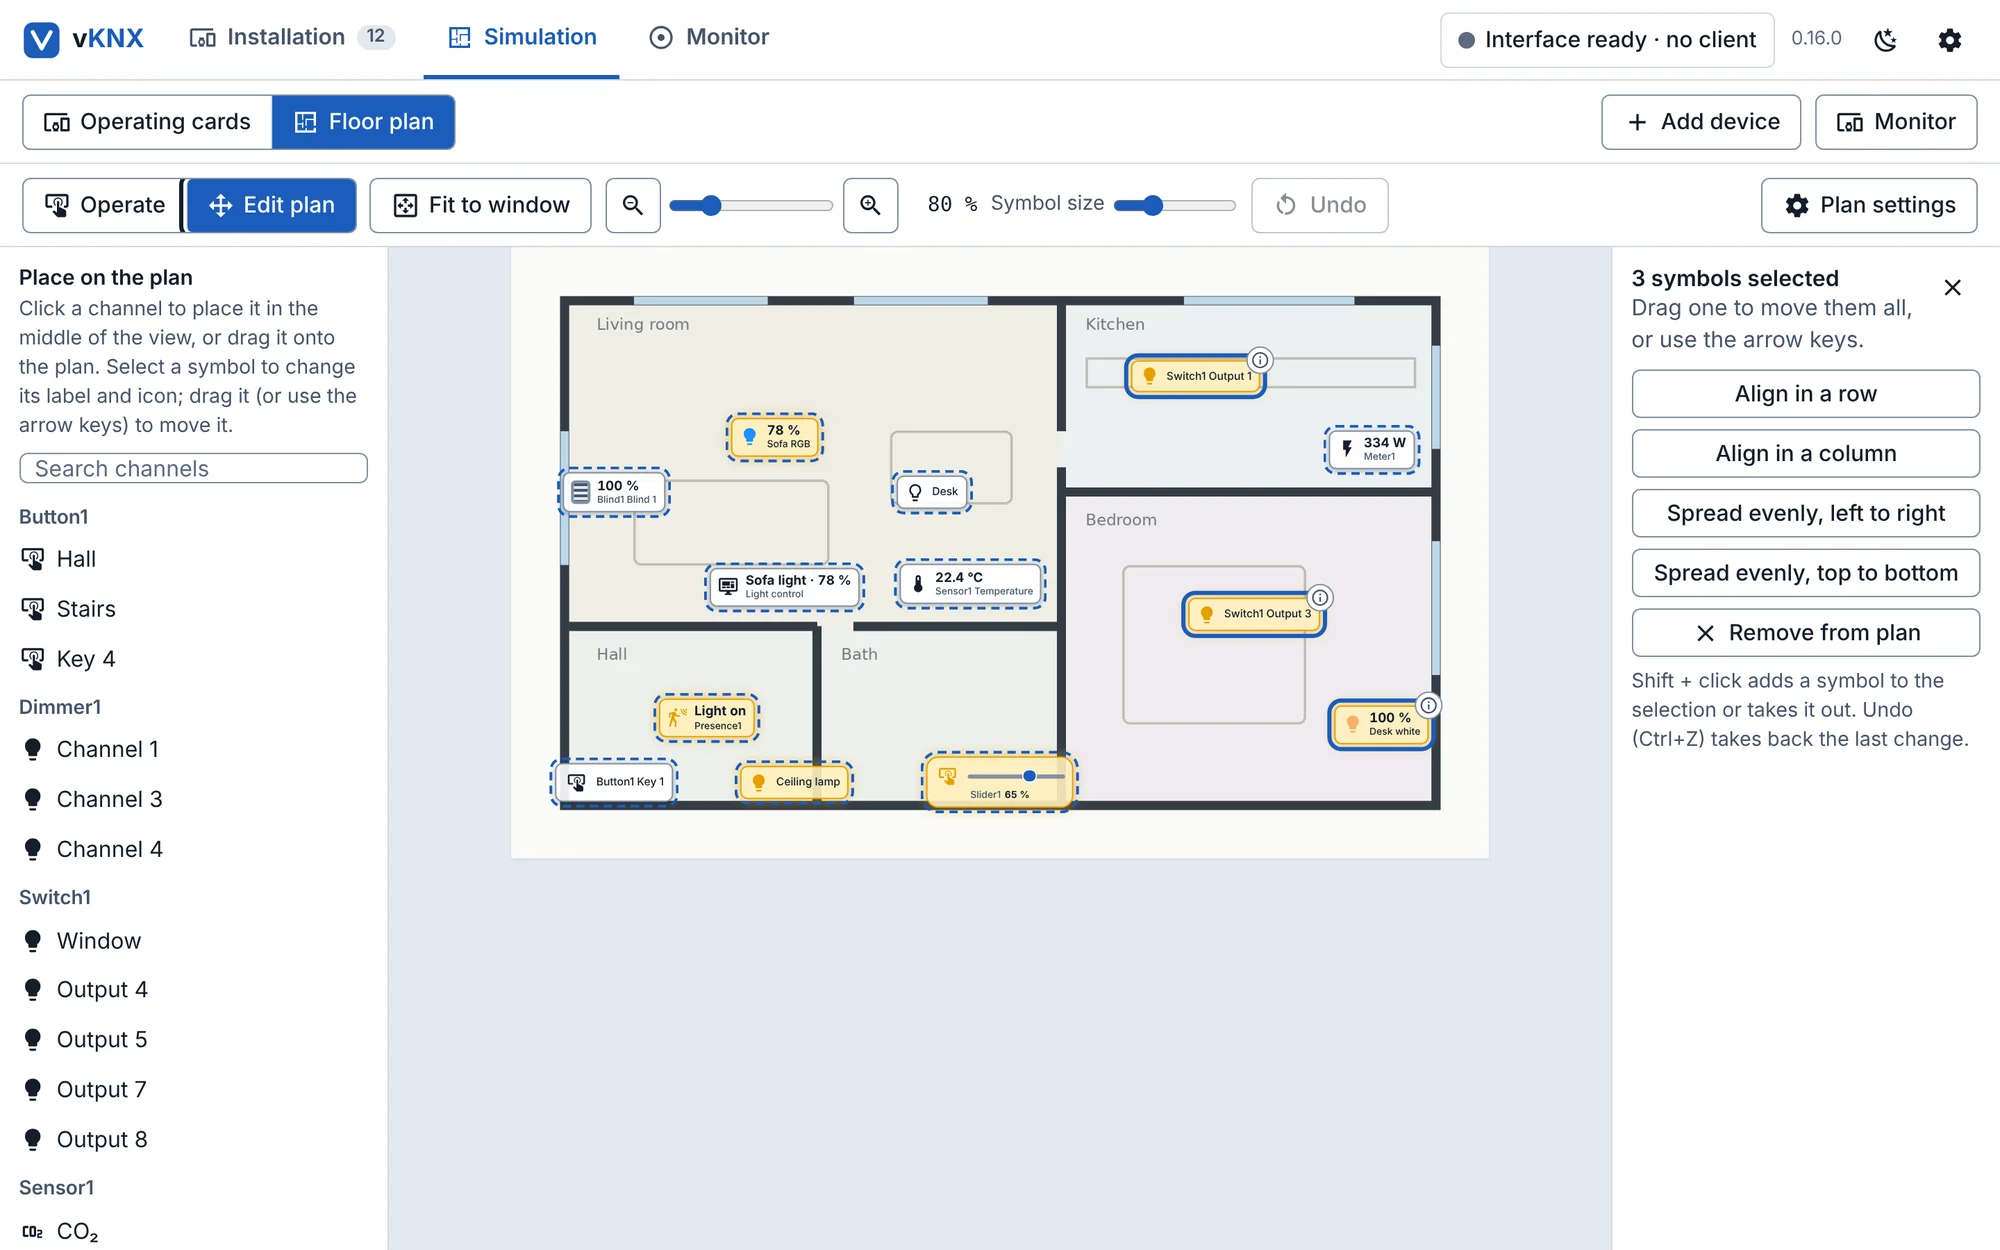
Select several symbols and align or distribute them, undo a mistake, and give each floor its own drawing. In use, a click on a symbol opens the device’s operating card right on the plan.
vKNX runs on an ordinary Windows computer and shows up in ETS as a KNX interface. The devices are programmed the way real ones are.
Export the devices with their addresses and ETS downloads, the floor plans and the icons as one .vknx file. The receiver opens it and can operate it, also without ETS.
Cards and the floor plan show lamps, dimming levels and blind positions. The telegram monitor shows who sent what to which group address.
Build several lines and areas with couplers. A telegram only crosses a coupler when the filter table ETS downloaded lets it through.
Two secure devices with a device certificate to type into ETS. Students see what changes when group telegrams are encrypted.
Up to eight floors, each with its own drawing. Place lamps, blinds, sensors and buttons where they sit in the building.
The project’s teaching devices cover everything from a single lighting circuit to installations with multiple KNX lines.
vKNX-Setup-x.y.z.exe (the installer; no administrator
rights needed). Prefer not to install? Download
vKNX-x.y.z-windows.zip, unzip it and run it.The things people run into most often, and what to do about them.
Go through these in order:
The Installation view in vKNX shows a checklist for each device and hints about what ETS has just tried, for example “programming button not pressed”.
Press the programming button on exactly one device in vKNX. Its indicator turns red, and only that device answers ETS. Then choose “Program individual address” in ETS, and download the application afterwards.
Another device, or the interface itself, already uses that address. Look at the device you have downloaded to and check the address on its card in vKNX. Then change the address in your ETS project to a free one and download again. The Installation view warns about duplicate addresses and about an address that equals the interface’s tunnel address.
ETS asks the interface how long telegrams may be. If it sees 15 instead of 254, ETS refuses downloads that need long telegrams. Versions before 0.12.1 could end up with 15 when the computer was busy while vKNX started. Update to the latest version (cog icon, then “Check for updates”).
If it still happens: restart vKNX, and open an issue on
GitHub with vknx.log and
console.log attached. They are in
%LOCALAPPDATA%\vKNX\data. A line starting with
[interface] in vknx.log shows when
vKNX had to put the value back to 254.
Set the interface to the main line. With lines 1.1, 1.2 and 1.3, choose 1.0 in Settings → Interface for ETS, and use the same topology in your ETS project. Then ETS reaches every line through the couplers.
Download the couplers first. A coupler filters group telegrams with the table ETS calculates, so a telegram that does not arrive on another line is often a missing entry in that table.
Yes. vKNX saves a device a few seconds after ETS has done something to it (an address, a download, a restart) and again when the program closes. After the next start the devices still have their addresses and downloads, also the KNX Data Secure ones, and ETS can continue with a partial download.
Only a forced stop in the middle of a download can lose its last few seconds. What is only live, such as a lamp being on, starts over.
vKNX uses a test manufacturer ID that ETS shows as KNX Association. The products are not made or certified by KNX Association. If an older vKNX version is already in the ETS catalogue and ETS complains when you import the new product files, remove the old vKNX entries from the catalogue first and import again.
ETS 6, which is bought separately from KNX Association. The project author has tested with ETS 6.4.1. Other versions have not been tested.
vKNX decodes values from the data types that the products declare. If a group address is used by devices with different types, or by no device at all (for example a telegram ETS sends to an address nobody uses), the monitor shows the raw bytes and “Unknown DPT”.
In Settings → Share, choose “Export installation”. You get one
.vknx file with the devices, their addresses and
ETS downloads, the floor plan and the icons. The receiver opens
Settings → Share, chooses “Import installation…”, sees what is
in the file and confirms. The import replaces their whole
installation, and their old one is saved as
backup-before-import.vknx.
What is only live, such as lamps being on or the position of blinds, is not in the file. The file also contains the security keys of secure devices, and to change parameters or group addresses the receiver still needs your ETS project, so send it along.
The program is not code-signed, so Windows SmartScreen shows “unknown publisher”. Choose “More info”, then “Run anyway”. The first start also asks for a firewall exception, which ETS needs to find the interface.
No. vKNX simulates the bus itself. ETS talks to it like to a KNXnet/IP interface, but nothing reaches physical KNX devices.
Still stuck? Open an issue on
GitHub. Attach vknx.log and
console.log, and the exact text of the ETS message if
there was one.